More progress on the Freight Port table.
Constructed Containers
First off, a big bunch of colourful containers using the same card-wrapped-over-EPS construction method as the first one. Note that the taller pile at the back is a single piece representing four containers.
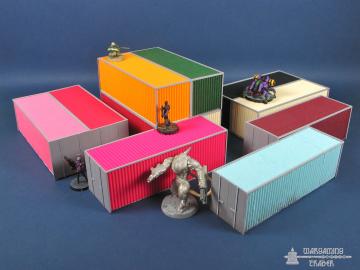
At this point, the grey parts are all flat grey.
Tile Texturing
For the MDF tiles themselves I'd planned to add a layer of textured paint then paint them to look like tarmac, but came across this neat tutorial for scoring the MDF directly to look like weathered concrete slabs.
Picking up one of the spare pieces of MDF I did a test to see how well it would work, and more importantly how long it would take!


After some false starts, it started coming together well. A steel ruler and a cheap sculpting tool were used to scribe out the main intersections and then the scribing tool was used to add all the cracks and rough edges. A small section was painted with a sponge to see how it would come out:


Pretty good! Here's the tools involved, the wire brush was used to remove the gloss surface before undercoating:

Tile Painting
On to the main painting of the test tile. I managed to dodge showers (something of an issue in Dawlish at the moment) and got the tile undercoated with black spray primer. Unfortunately this raised a lot of fibres on the surface which were then scrubbed off with a hand hoover brush attachment.


Several layers of sponged grey were added, building up the lightness each time. The final application had pure white added in a few places and then blended in using the sponge which still had some grey on it.


Finally, the very edges of the cracks and slabs had highlights added using dilute white.


So far, so good!
More Tile Work
Now that I knew the idea worked, texturing started on the first two 'occupied' tiles which correspond to the single-layer containers seen above. Due to the spaces that would be taken up by the containers, shortcuts were possible which made it much quicker - plus it's always faster to do something again than learning how to do it the first time...


Yellow Line Marking
Part two of the MDF tutorial included adding markings by masking out areas of the tile and i decided to give this a go as well as it lifts the finish up to another level.
For a very simple tryout I ignored suggestions of trying to do a box crossing (ha ha ha, you know who you are!) in favout of a much simpler rectangle of dashed lines.
Step one - marking out.


Step two - a base coat of foundation Iyanden Darksun which probably wasn't needed and was also applied with a bit too much liquid, it turned out to have seeped under the tape in places.


Step three - a layer of Sunburst Yellow added over the top.


Step four - another layer of yellow, this time a mix of Sunburst, Golden Yellow, Bleached Bone and white.


Step five - paint applied, now the moment of truth!


If I'm being really picky it's a bit flat in colour but in general I'm really happy with it. Future attempts will involve starting with that last mix and using a single coat so that it blends in slightly more with the underlying colour of the tile.
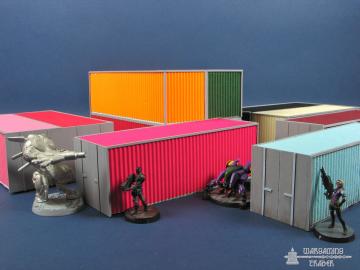
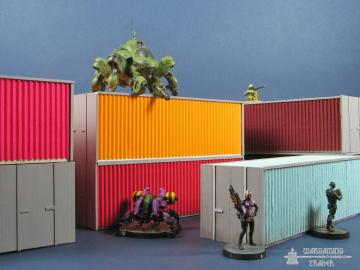
Lastly, tile plus containers (under mixed lighting)! Note that about half of the containers have had the grey areas weathered and highlighted now.

Ian


great work!